
You have heard about the Rowsandall Virtual Indoor Rowing Races and want to try it out? This post describes how to register for a race and submit a result. It also describes how you can set up your own race.
Registration
- Go to https://rowsandall.com/rowers/virtualevents and select your race of choice (figure 1 below). Do observe the registration deadline. After the registration deadline, you cannot register any more.
- Click no the name of your race of choice. You can also click on the circle in the “click for details” column
- The race page opens. Click on “register” (figure 2). If you’re logged in to rowsandall.com, you will be redirected straight to the race registration form. If you’re not, you will have to log in first (or create an account and log in).
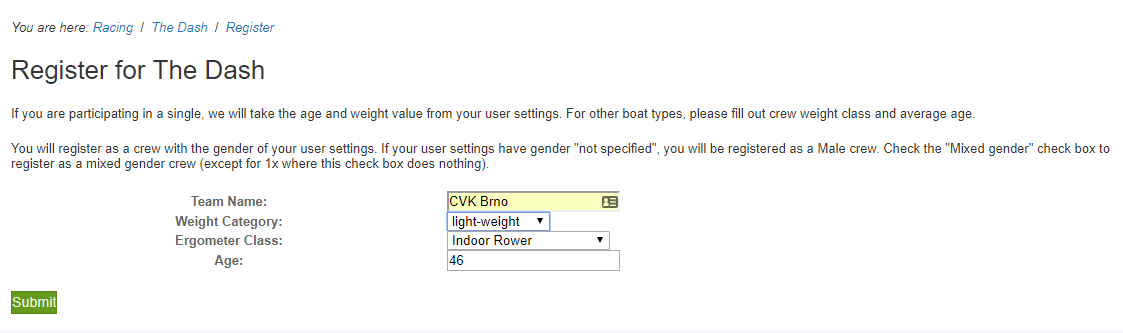
- On the race registration form (figure 3), check your details and update them. Submit the form.
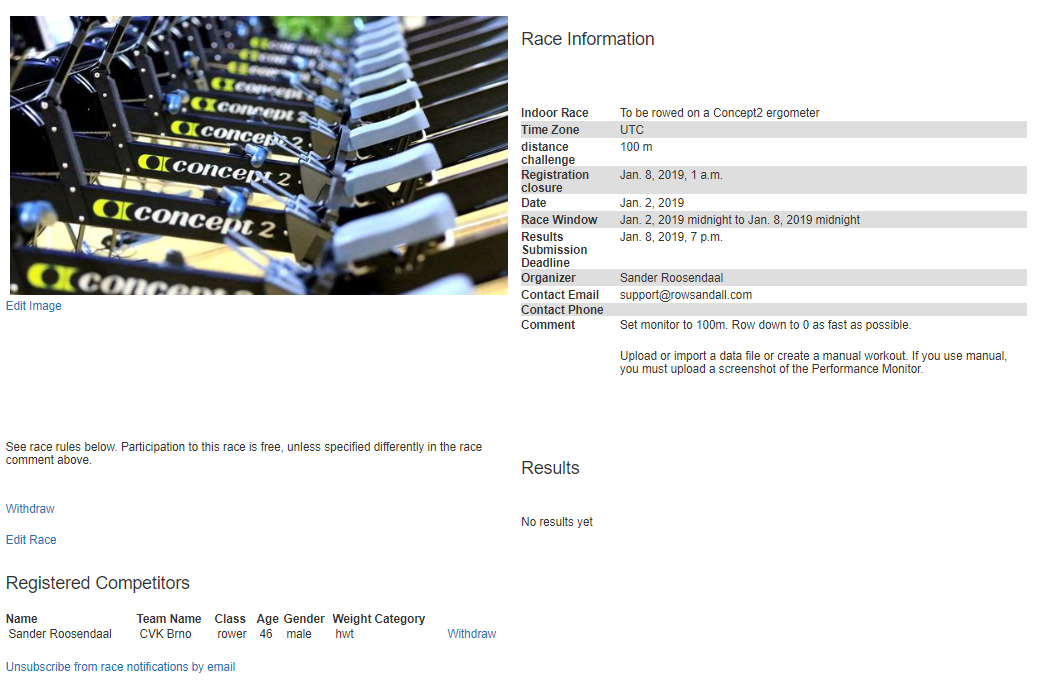
- You are now registered. Your name will show up on the competitors list (see figure 4). You may have to scroll down a bit on the race page to see the list of competitors


Result Submission
- Once the race window has started (Jan. 2, 2019 midnight to Jan. 8, 2019 midnight in this case), you can sit down on the erg, dial up the race distance (100m for this race) and row. Please be aware that the race may be running in a different time zone than yours. You can find this information on the race page.
- Use ErgData, BoatCoach or Painsled to capture the data. If you cannot do this, take at least a picture of the Performance Monitor with your result.
- Get the data in rowsandall.com. There are several ways to do this. If you’re using one of the apps above, you can send the data straight to rowsandall.com by email. Alternatively, you may sync to the Concept2 logbook, or you can upload a file. Finally, if you don’t have data, there is the option to upload the file manually.
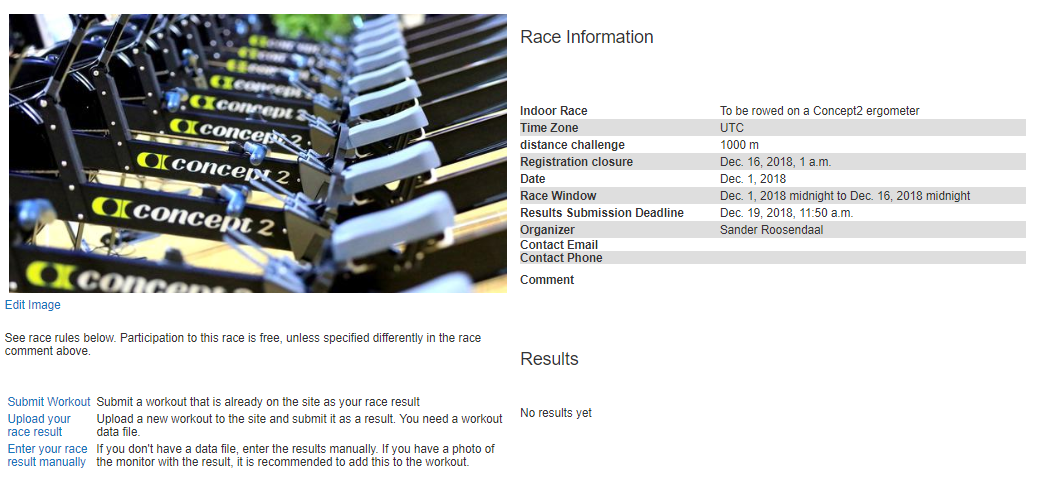
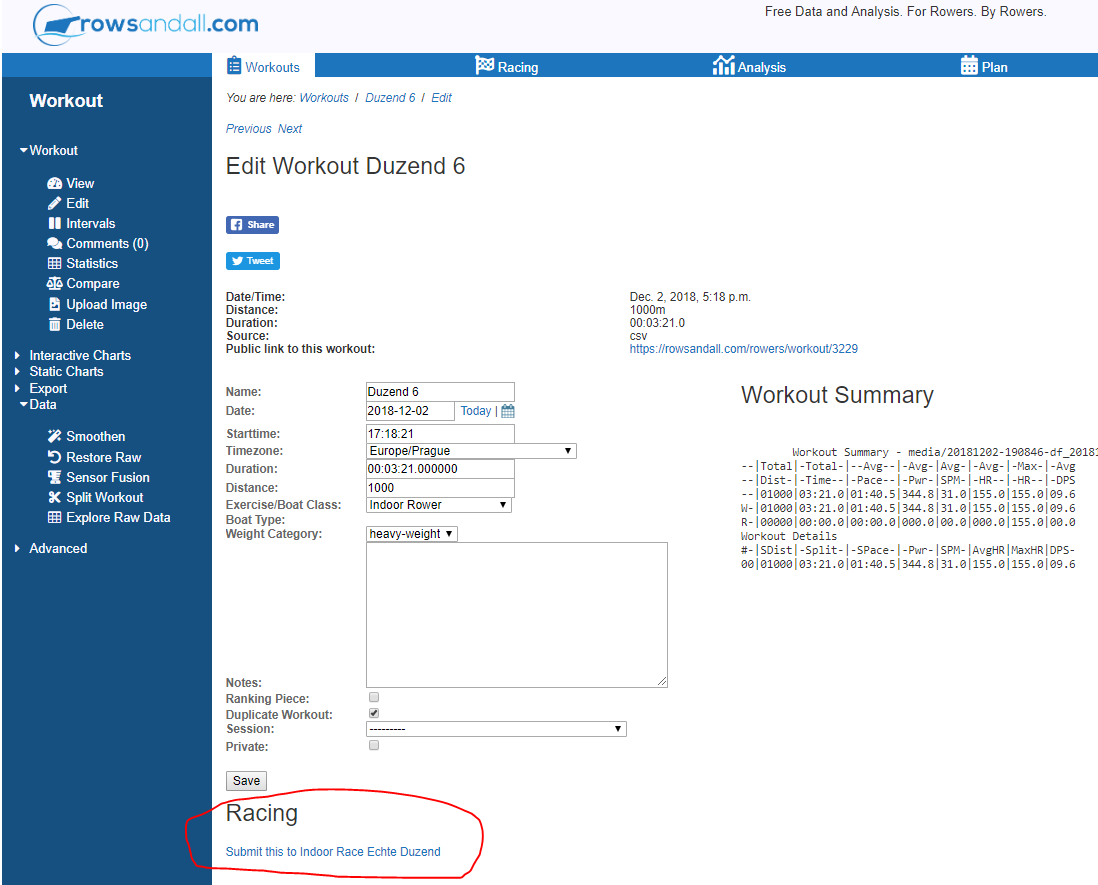
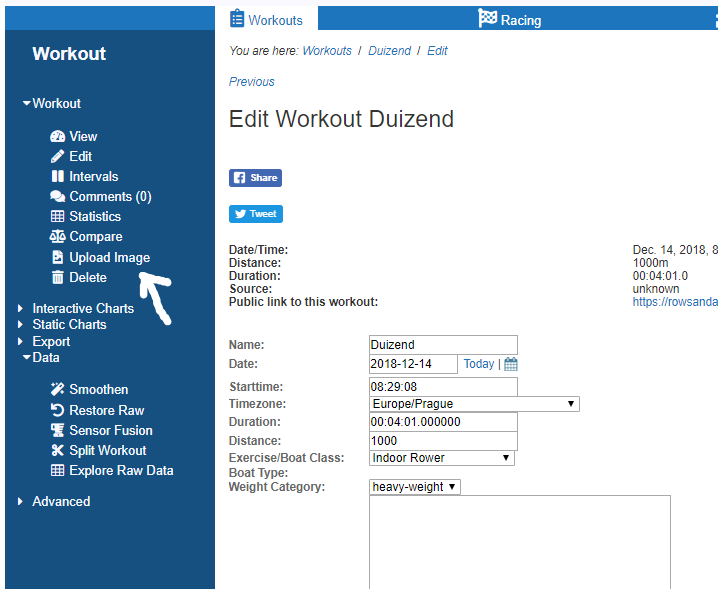
- You can submit the result through the links on the race page. Alternatively, you can submit through a link directly from the Workout Edit page. (Figures 5 and 6).
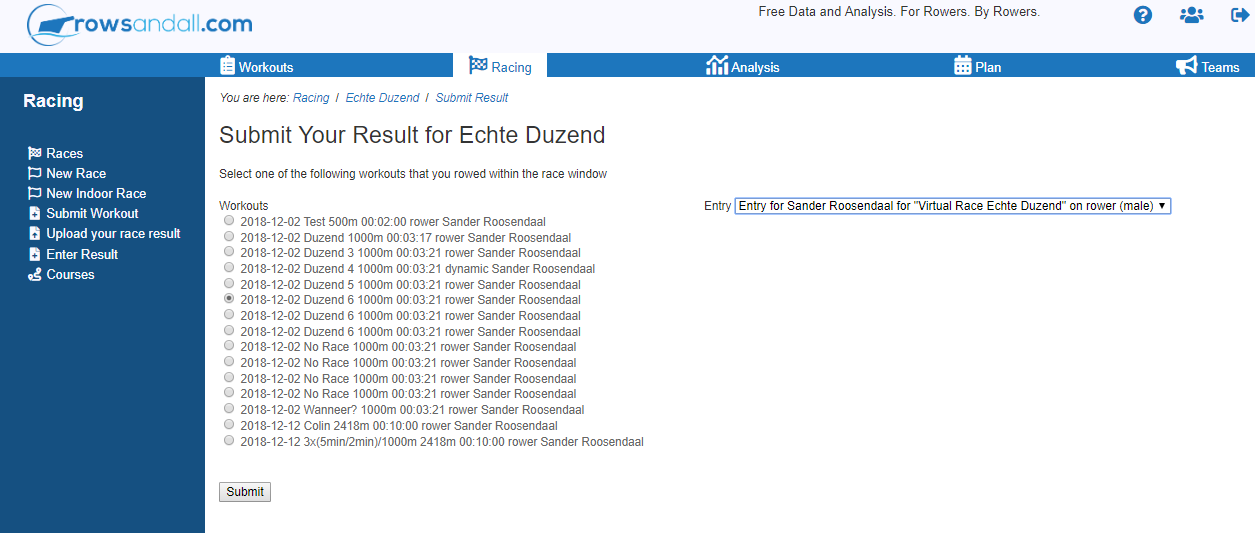
- If you’re submitting an existing workout, you will be redirected to a page where you can check that you’re submitting the right workout to the right page (figure 7).
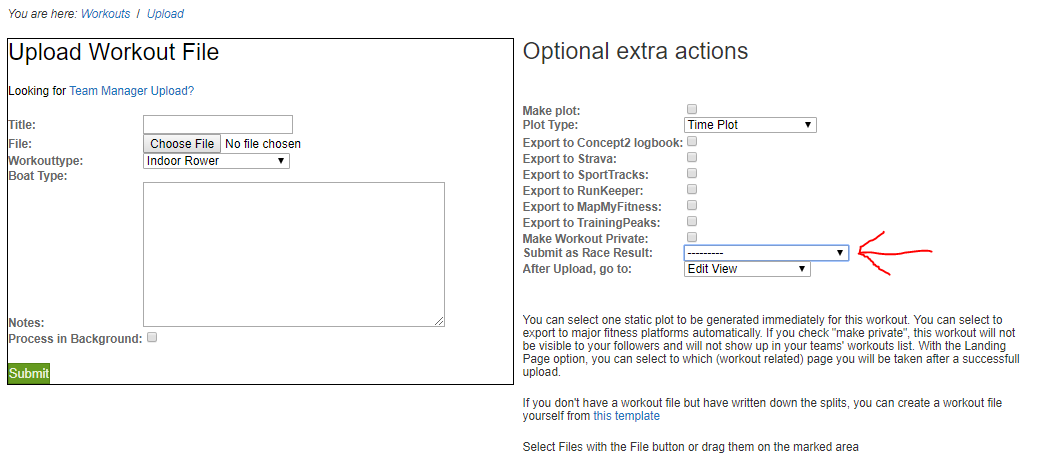
- If you are uploading a new file, you can select the race immediately in the upload form (figure 8).
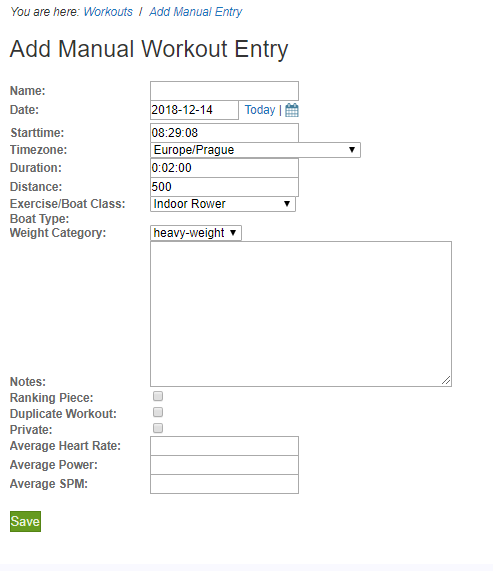
- If you don’t have workout data and have to enter a result manually, you will be redirected to the form shown in figure 9. Update the workout distance, time, date, start time, and enter average stroke rate. After submitting the form, the site will create a “synthetic” workout for you and you will be redirected to the workout edit form, from where you can continue like in figure 6.
A few final comments. After you have registered for a race, you can still withdraw until the start of the race window. As a registered competitor, you will get email notifications when new competitors enter the race and when race results are submitted. You can toggle these notifications from the race page.
Screenshots can be uploaded from the Workout Edit page, using the workout context menu on the left as in figure 10.
Finally, if you do another race attempt during the race window, you can submit the new result. You have “unlimited” attempts, as long as you row during the race window and submit your result before the submission deadline.
Creating your own race
Creating your own event is simple. Just follow these steps:
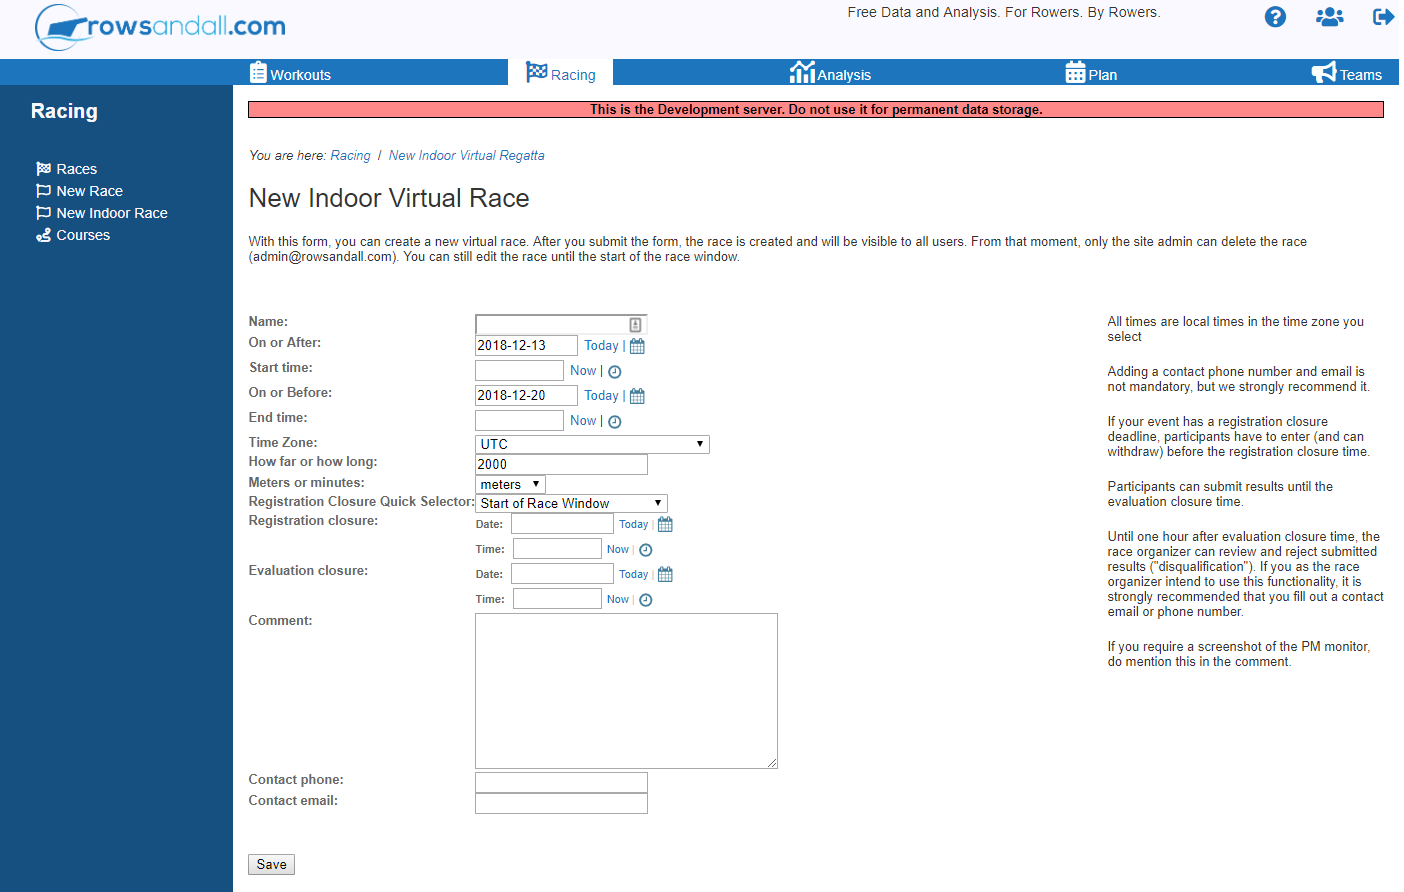
- On the Race tab, click on the “New Indoor Race” link on the left menu. This will redirect you to a form (figure 11). Start filling out.
- Race Name: The name you give to the event.
- On or After and Start Time: Defines the start of the race window. Times are in the time zone that you select. Results must be rowed after this date/time.
- On or Before and End Time: Define the end of the race window. Results must be rowed before this date/time.
- Time Zone: By default this is set to your home time zone (which you define in Settings). This is the best option if your event will have a local character. If you have participants from all continents, I recommend to use “UTC”. The participants will have to convert that to their own time zones. Changing the time zone will affect the start and end time of the race window, as they are defined in the time zone that you select.
- How far or how long: Put in the race distance in meters (100m minimum) or race duration in entire minutes (1 minute minimum).
- Meters or minutes: Select “meters” for a distance event (like a 2000m row) and “minutes” for a duration event (like 60 minutes)
- Registration Closure Quick Selector: Here, you define when the race registration closes. Options are “Start of Race Window”, “End of Race Window”, “Evaluation Closure Deadline” and “Manual – Select Below”. Competitors will have to register before this date/time in order to compete.
- Registration Closure: Shows the time and date that you have selected with the quick selector above. If you have selected “Manual”, you can enter the deadline.
- Evaluation Closure: Until this date/time, people can submit new results. After this deadline passes, you have one more hour to eventually disqualify people.
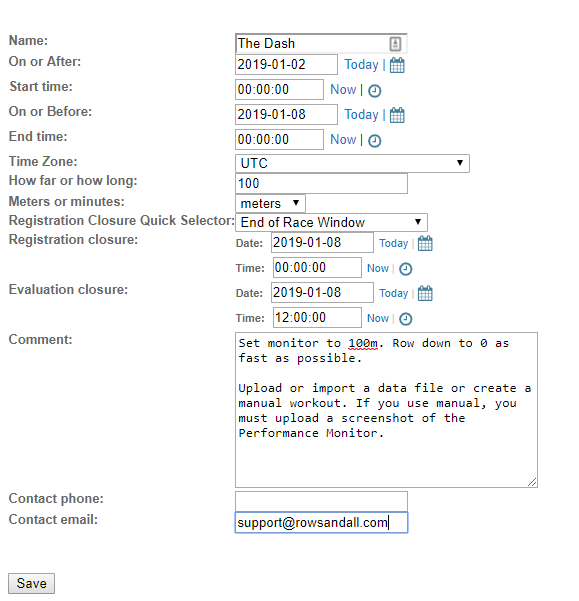
- Comment: Use this field to add any instructions to the competitors. It is recommended to not leave this field empty. At least, add a welcome message.
- Contact Phone and Contact Email: It is recommended to add at least a contact email, so competitors can contact you in case they have questions.
- Once you submit the form, the race is live and will be visible to all Rowsandall.com users. We will also announce the race on Twitter.
Managing your own Race
As the race organizer, you have a few tools to manage the race. To make the race page more exciting, you can add an image or logo. When people enter a result, you can disqualify them. This will just remove the result, not the registration. When you do this, you will have to justify the disqualification with a message that is also sent to the disqualified participant. Use this option responsibly.