With the omnipresence of GoPro and other action cameras, taking a video of your rowing has never been easier. Combine this with rowing metrics from your phone app, SpeedCoach (with power measuring Empower Oarlock) or other unit and have the perfect system for analysing your technique post-row, or even for remote coaching.
With video editing software from DashWare, it is extremely easy to add rowing metrics to your video. The only difficulty is to read the data into the software. Following this tutorial, it was actually quite easy to make DashWare work with CSV files exported from Rowsandall.com. Here is the recipe:
- Row and record your row.
- Get your data into rowsandall.com (file upload or import from Strava or other)
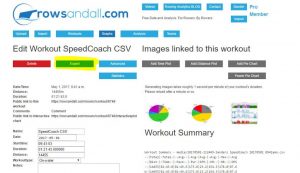
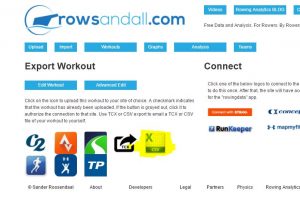
- On the workout edit page, go to “export” and click on CSV. The site will send a CSV file to your email address. See the following two pictures:
You can skip the following steps if you use the prepared Data Gauges and Data Profile (see the end of this post), but I am adding them for completeness.
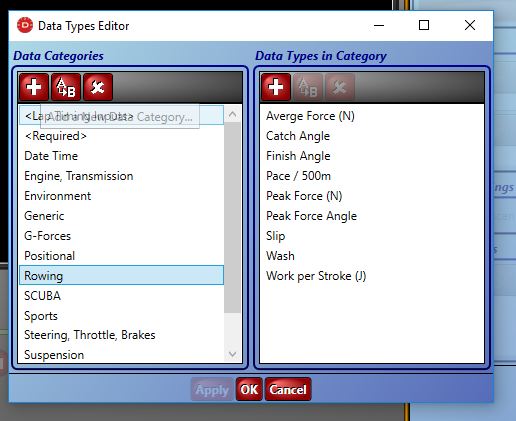
- Start DashWare. Do not start a new project. Instead, hit “Cancel”, then “File, Edit Data Types”. Click on the “+” to create a new Data Category “Rowing”. Then click “+” on the right-hand side to add the parameters that you are interested in. You will end up with something similar to the following image:

- Click “Apply”, then “OK” and you have your “Rowing” data category.
- Click “File” and then “Edit Data Profiles”. Click “+” to add a new Data Profile.
- Click “Open Data Profile” and select the CSV file that you downloaded from rowsandall.com
- Click on the header line, then click “Mark Header Line”.
- Click on the first row of data, then click “Mark Data Start”
- You can use “Test File/View Data” to check if the data is parsed correctly.
- On the Column Mappings pane, click “+” and map the Input data column ” Elapsed Time (sec)” to “<Required> \ Data Running Time, Seconds”
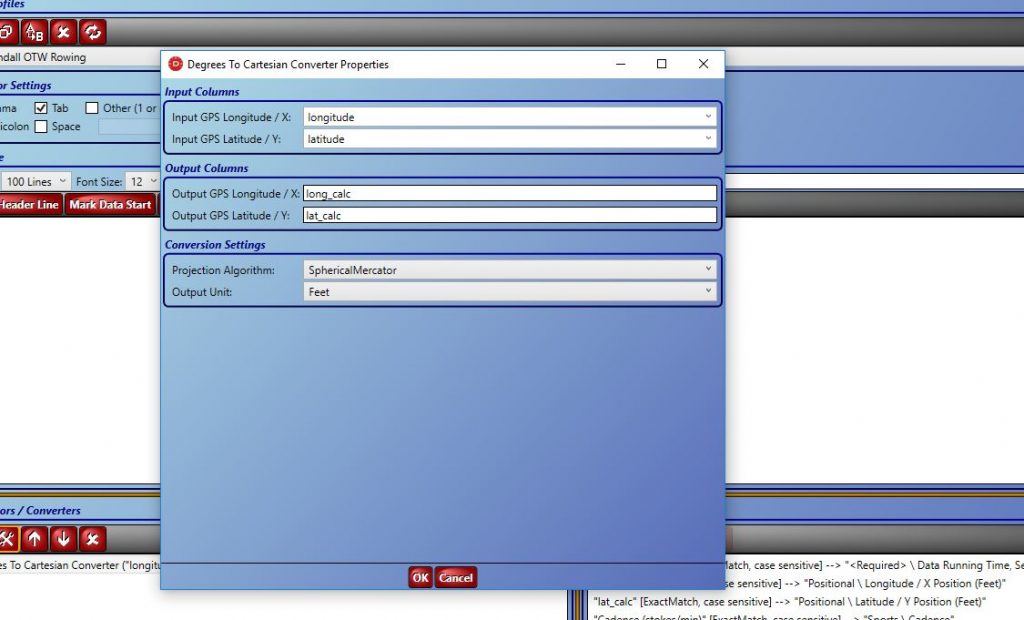
- On the Calculators, add “+” and add a “Degrees to Cartesian Converter” converting “longitude” and “latitude” to “long_calc” and “lat_calc” like in the following picture:
- On the Column Mappings, proceed to add mappings from the CSV headers to the correct Data Type. Here is how I have mapped it:
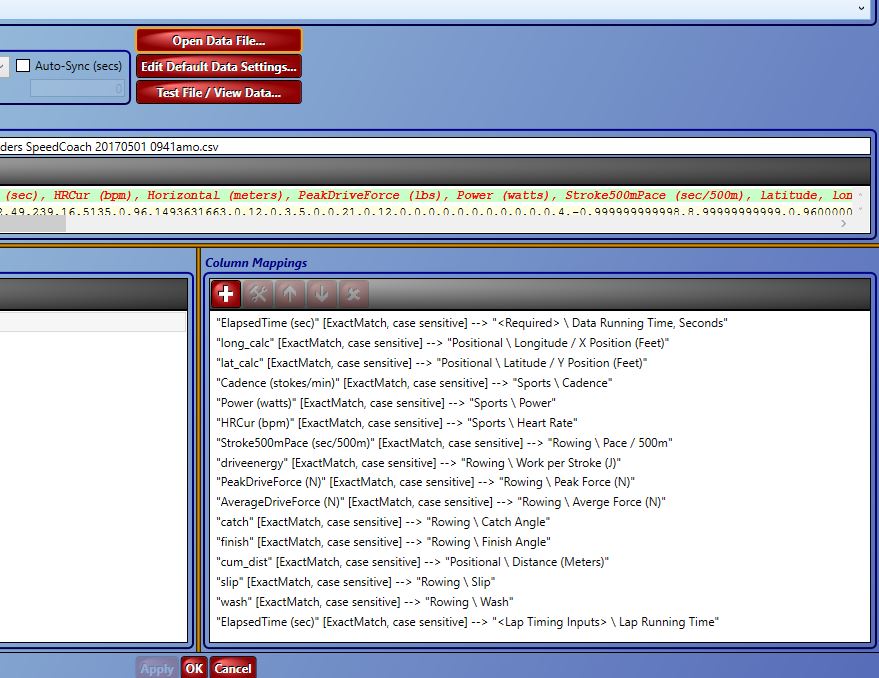
(I did have difficulties here where the “Rowing” data category wouldn’t show up. Closing DashWare and restarting the program did solve the issue.)
- Click “Apply” and “OK” and close the Data Profile Editor
- Now we will proceed to make the gauge. Click “Gauge Toolbox”, “Create a New Gauge”. Give the Gauge a unique name and click OK.
- In the Gauge designer, to add a metric, you have to
- Click “+” in Gauge Inputs and select the metric. For example “Rowing / Catch Angle”.
- After you have added all the inputs you want to display, go to the “Components” Pane and add “+” to add the gauge elements
- For the most simple display of a metric, I have added a “Text” field for the metric name, and a “Dynamic Text” field mapped to the Input Metric. This is pretty straightforward.
- To display Pace in the right format, you have to select “Display as Running Time” in the “Component Properties” (the toolset icon).
- You can drag the components around and group them as you wish. When you’re happy with the result, click “File / Save Gauge”.
- Back in DashWare’s main display, do the following (I am a bit brief here because there are plenty of tutorials online):
- Start a New Project
- Add a Video
- Add the CSV file from rowsandall.com as a Data File.
- On the Synchronization panel, make sure you synchronize the video and data file.
- From the Gauge Toolbox, select your Rowing gauge and drag it to your video.
- On the Synchronization Panel, set the start and end of the part of the video that you want to export
- Export to a Video. The end result should be something like this:
Yes, I am pulling a bit with my arms right after the catch. Not good.
To make things easy, I am sharing my Data Profile, Data Types and Gauge here: Click here to Download
After unzipping, the CustomDataTypes XML file goes in “My Documents/DashWare/Settings” on your computer. The “Rowsandall OTW Rowing” XML file goes in “My Documents/DashWare/DataProfiles” and the “Rowsandall Empower Oarlock Rowing” folder and its contents should be copied to your “My Documents/DashWare/Gauges” folder. The exact location of these folders on your computer may vary, but I am sure you will figure it out. That should give you an exact copy of my setup, which you can then change to your liking.
You can of course also use the FIT or TCX export that your rowing hardware/software offers and build your own Data Profile for rowing around that. The advantage of using rowsandall.com as an intermediate is that your data profile will work independent of which app/hardware you used to record your row.
Use the comments section below to ask questions if things are not clear.
[amazon_link asins=’B01M14ATO0,B01C80O0ZU,B01LZTLCFX,B00PLBXUMS,B01950TF8I,B00N8JIPPC’ template=’ProductCarousel’ store=’rowingdata-20′ marketplace=’US’ link_id=’130d20b5-2f17-11e7-a14f-01def87c4e13′]

