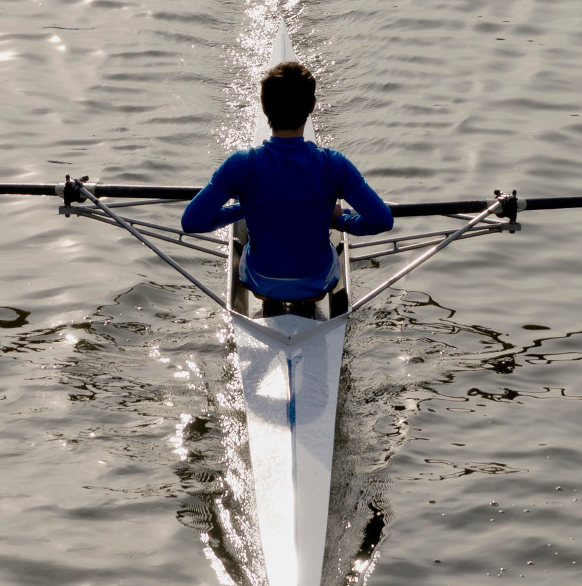
When you row on a river, you don’t have much of a freedom in terms of what course you take. You can row up river or down river, you can decide how far you want to go. But, generally you are governed by set traffic rules and the path of the river itself.
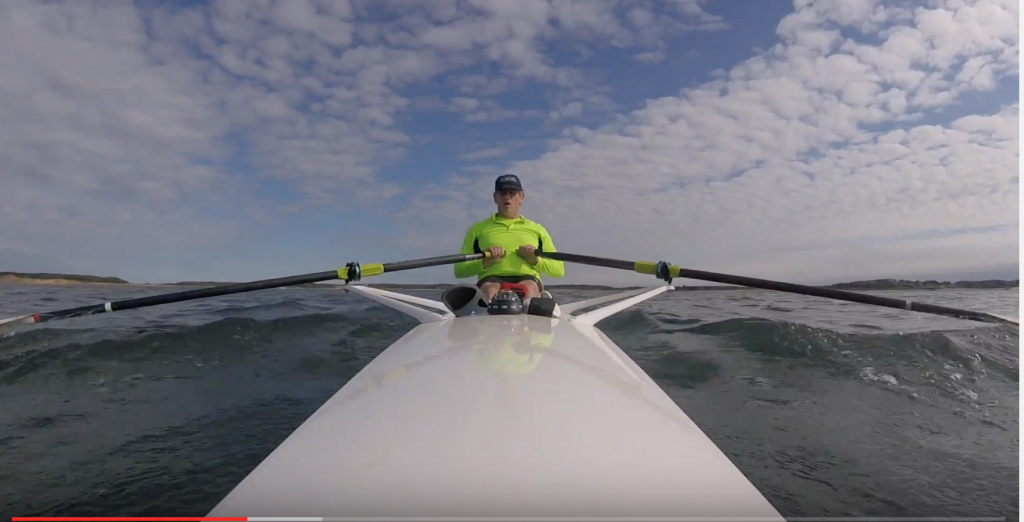
Coastal rowing is a bit different. There is an element of navigation required. Before you set out, it’s a good idea to understand the area that you will be rowing in. There can be rocks, shoals, and other hazards to avoid. Since rowing a small boat in open water requires both hands, is done facing backward, and is an aerobic activity, there is a lot of value to preplanning your outing. It helpsa lot to have an idea of where you are going and what navigation aids you can expect to see.
Planning a row
To plan outings, I use a nautical chart plotting program called GPSNavX. This program allows you to download electronic copies of NOAA charts (it has international charts too), and provides tools to help plan and track.
To use the program, there are three concepts that you need to understand.
– Waypoints: Are specific locations on the chart that you define
– Routes: Are specific lists of waypoints in the order that define the route that you are planning
– Tracks: Is GPS data from an outing. (more on that later)
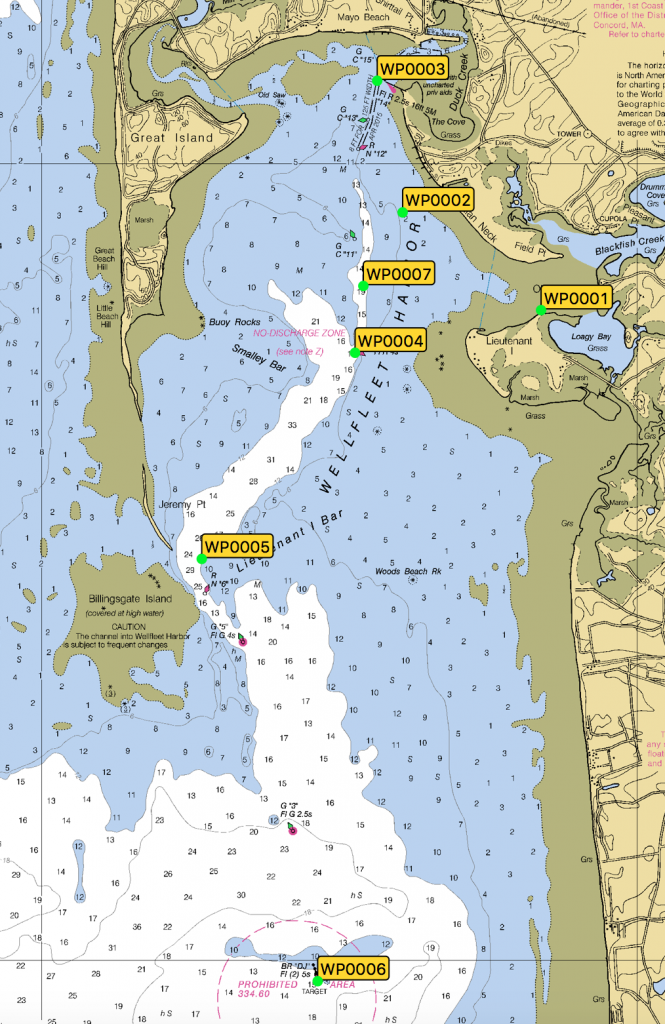
When you open the program and select a chart, you get a view like this.

Then you can define waypoints for specific places.
Then you can define the route by going from waypoint to waypoint. The program shows you the heading and distance for each leg as you go.
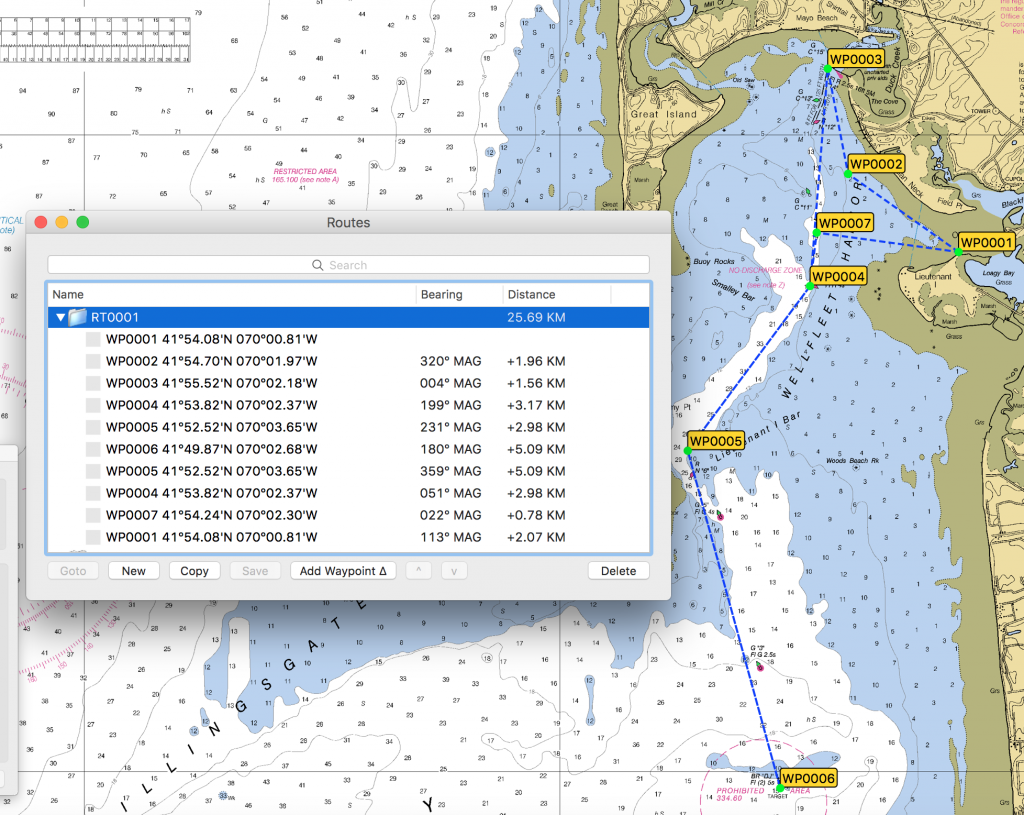
The route planner is quite helpful because the most straightforward way to navigate in a shell is by dead reckoning. You can basically go point to point by using a compass direction and a distance.
For a reasonably complicated route, like the one shown above, I print out the route directions, put them in a plastic zip-lock bag, and duct tape it to the boat where I can see it. I actually manually transcribe the headings and distances and I round them to the nearest 5 degrees and 0.1km. I want to be able to take a quick glance and keep the numbers in my head. So, for example on this row, I would start off and row 2km at 320 degrees. Then I would turn to 5 degrees and row 1.5km. It took a couple of attempts to work out the text formatting so that I could see it easily while rowing. Big bold fonts are key since there is usually a fair amount of water droplets on the top of the ziplock that you have to read through.
Open water rowing relies pretty heavily on steering to compass course. For rowing, Ritchie makes a specific reverse reading compass. The disc is mounted 180 degrees out from normal so that you can see the actual bearing when the compass is mounted behind you in the boat. That’s a lot easier than adding or subtracting 180 degrees from all headings.
I have found it to be very difficult to hold courses more accurately than about 5 degrees. Even then, you are bouncing around your heading constantly because of waves and trying to do an eyeball average of your heading. Additionally, a boat as nimble as a rowing shell can turn a lot faster than the compass can spin, so there is a lag between boat bearing and the compass bearing during sharp turns.
Another navigation challenge is the tide. The area where I row has a ten foot tidal range. The water is constantly in motion, and always changing. You might be steering due east, but if there is a north setting current, you will end up going significantly north of your target. For this reason, I have found it a very good idea to make my waypoints to be “real” things, like buoys. That way the errors do not accumulate over time, and I can correct any setting errors as I see them happening.
Tracking a row
To track my row, I have two bits of electronics in the boat. I have a NK Speedcoach GPS, and my iPhone in a waterproof case running the crewnerd app. You might wonder why I want to have both. Well, mainly because I like both of them for different reasons. The speedcoach has a very fast updating GPS based pace readings. It updates 5 times faster than the sensor in the iPhone. It also has a fantastically long battery life. And ultimately, I think I might put my EmPower Oarlock on my coastal boat and try to understand more about the biomechanics of rowing in a short wide boat.
Why the iPhone? I mainly want to have a phone in the boat in case I have an emergency and I want to make an emergency call, but since it’s there, I might as well put it to good use. There are two apps for the iphone that I use rowing. One is CrewNerd and the other is Rowing in Motion (RiM). They are both excellent apps and they both have the single most important feature for open water rowing, a screen lock that keeps stray waves from shutting them down. The reason that I prefer CrewNerd for coastal rowing is pretty basic. CrewNerd supports both a portrait and landscape phone orientation, while RiM only supports landscape. The only spot that I had to mount my phone that had good line of sight visibility is a vertical mount, so CrewNerd worked better for me.
When I row, I set both the speedcoach and CrewNerd to display pace, stroke rate, elapsed time and total distance. They provide real time feedback in the boat and they also save data for analysis later. There have also been times where the water has been so rough that the speedcoach doesn’t measure stroke rate correctly and having CrewNerd was pretty useful.
Now that I am doing some longer rows that are going further offshore, I’ve added a third bit of electronics. I now carry a handheld marine VHF radio. I store in the compartment in boat and it isn’t turned on, but it floats and it can automatically send position information with a distress signal to the coast guard. I hope I never need to turn it on and use it, but when you’re 3 miles from shore on a windy day, it’s reassuring to know that you can summon help if you have an emergency.
Analyzing the row
After I get back from the row, I want to get both the CrewNerd data and the speedcoach data into rowsandall. For Crewnerd, this is very straightforward. The app let’s you email out a TCX file for your session, and rowsandall supports email import of workouts.
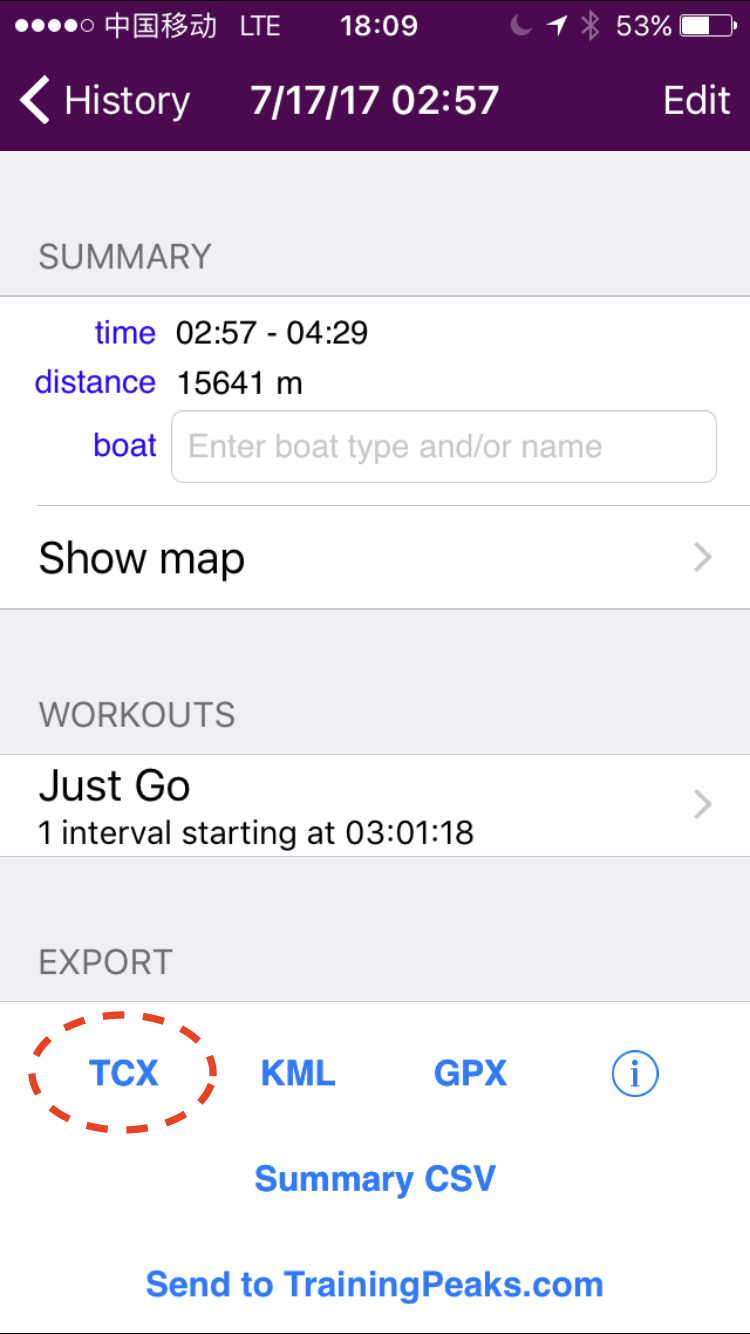
I just send the email to workouts@rowsandall.com and the workout is automatically added to log.
Once I’ve got the data in rowsandall, I have a routine set of things that I do.
- Generate a summary plot
- Generate a heart rate pie chart
- Define intervals for each major segment to generate summary statistics for the row
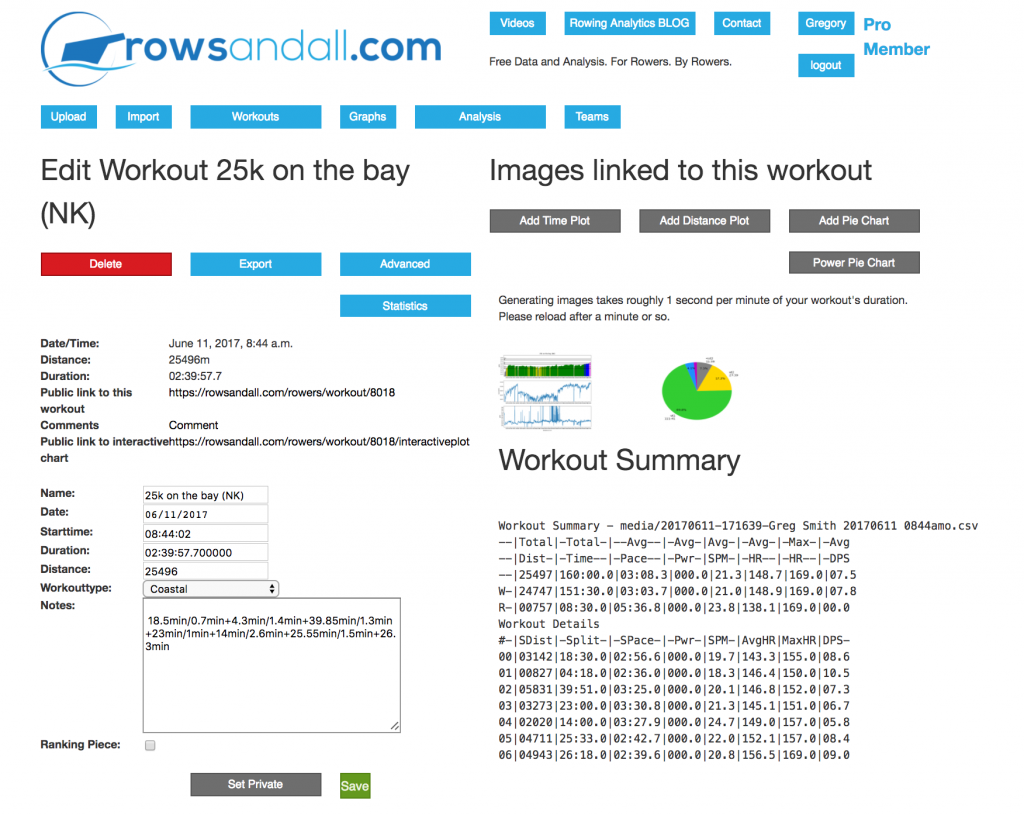
Here’s a view of the page after I’ve done that stuff.
Here’s the summary plot.
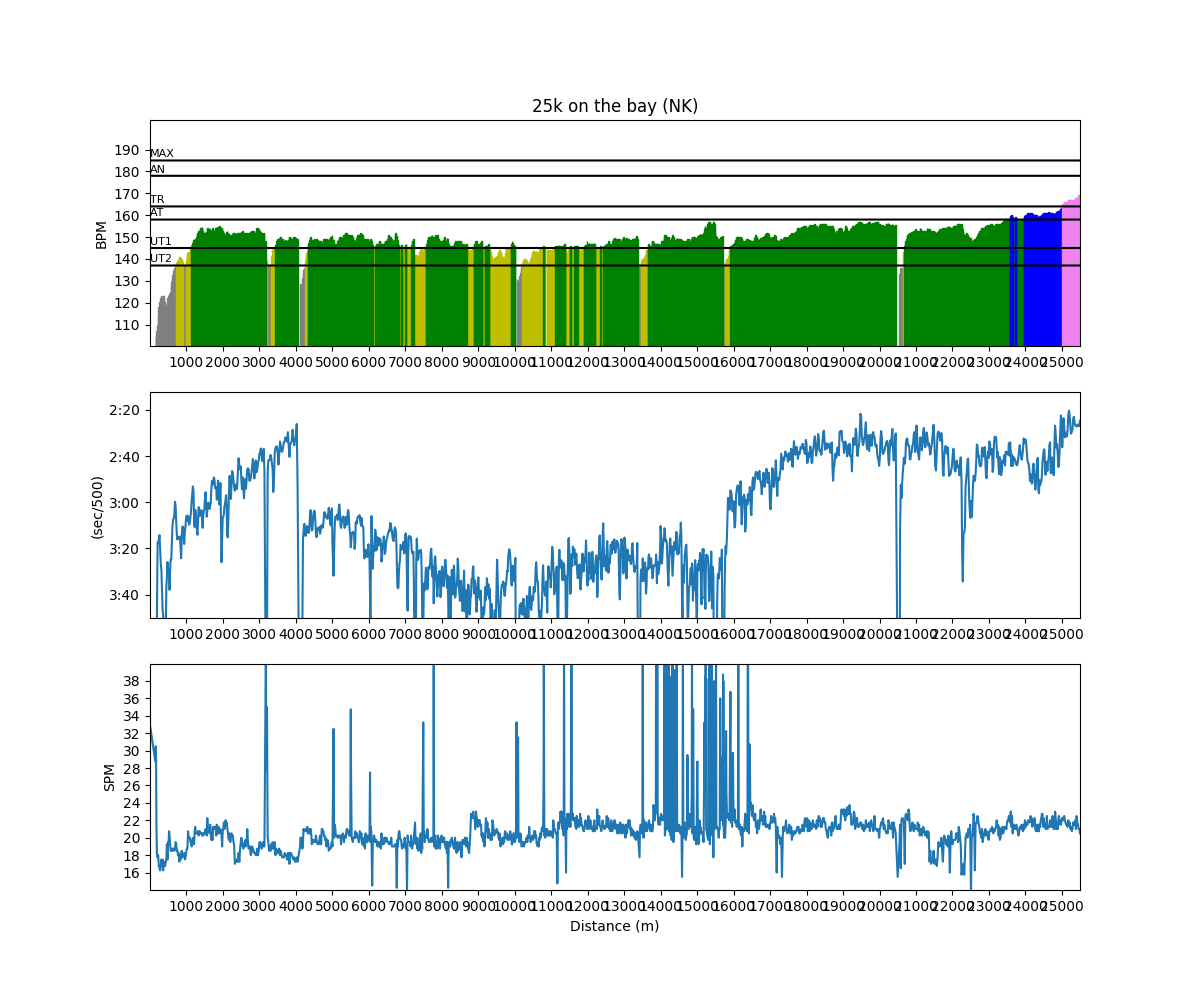
There some cool stuff going on in the plot.
- First, you can see the heart rate data. For a long row like this one (two hours and 40 minutes), you have to try to maintain your heart rate in a pretty narrow band. This row was pretty good. I got excited when I was close to the end, but otherwise, I was pretty disciplined.
- Second, you can see the dramatic effect of tide on pace. The section from 4000m to 16000m was basically straight into an incoming tidal current of about 1-2km/h. From 16000m to the end I was going with the current. It makes a huge difference. I was pretty pleased that I managed to keep my hr about the same in both directions.
- Third, you can see how the speedcoach loses it’s mind about the stroke rates when the water gets rough. The section from 14km to 16km was the furthest offshore, the waves were pretty large, and I was rowing straight into them. The pounding was enough to confuse the speedcoach.
The heart rate pie chart gives a good summary of the workout.
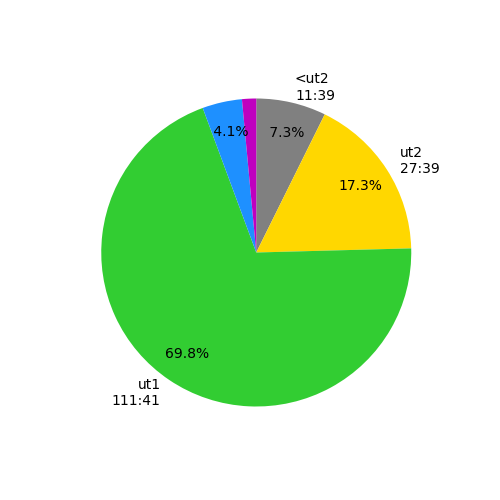
Yep, that’s 111 minutes of UT1. I was pretty tired after this row!
Finally there is the summary by leg.
Workout Summary - media/20170611-171639-Greg Smith 20170611 0844amo.csv
--|Total|-Total-|--Avg--|-Avg-|Avg-|-Avg-|-Max-|-Avg
--|Dist-|-Time--|-Pace--|-Pwr-|SPM-|-HR--|-HR--|-DPS
--|25497|160:00.0|03:08.3|000.0|21.3|148.7|169.0|07.5
W-|24747|151:30.0|03:03.7|000.0|21.0|148.9|169.0|07.8
R-|00757|08:30.0|05:36.8|000.0|23.8|138.1|169.0|00.0
Workout Details
#-|SDist|-Split-|-SPace-|-Pwr-|SPM-|AvgHR|MaxHR|DPS-
00|03142|18:30.0|02:56.6|000.0|19.7|143.3|155.0|08.6 - up to wellfleet
01|00827|04:18.0|02:36.0|000.0|18.3|146.4|150.0|10.5 - rest of the way to WP003
02|05831|39:51.0|03:25.0|000.0|20.1|146.8|152.0|07.3 - WP003 to WP005
03|03273|23:00.0|03:30.8|000.0|21.3|145.1|151.0|06.7 - quick stop to try to find Green buoy #3
04|02020|14:00.0|03:27.9|000.0|24.7|149.0|157.0|05.8 - rest of the way too WP006
05|04711|25:33.0|02:42.7|000.0|22.0|152.1|157.0|08.4 - Back to WP005
06|04943|26:18.0|02:39.6|000.0|20.8|156.5|169.0|09.0 - Back to the start
The last step of the process is to compare the actual row to the planned row. There are a couple steps to this.
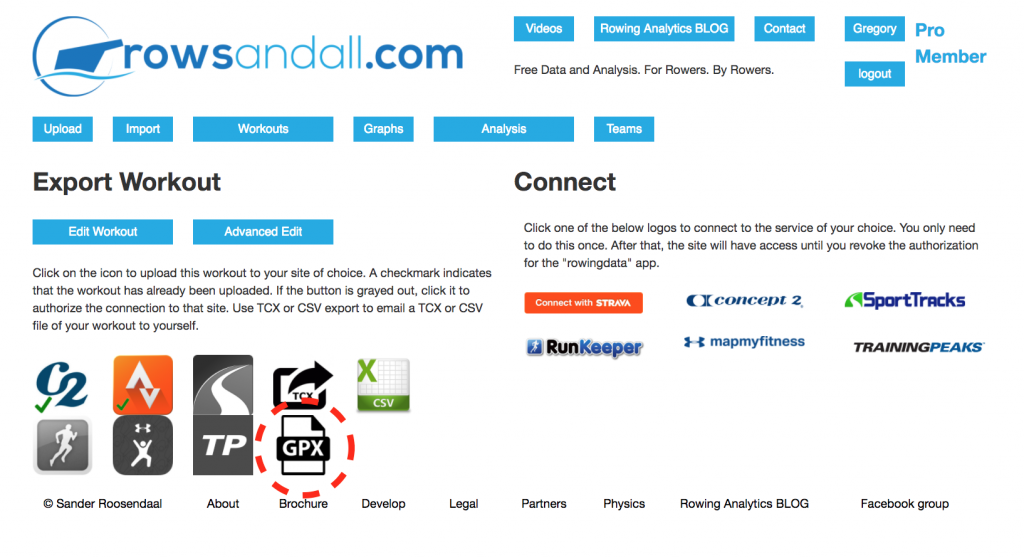
- export GPX data from rowsandall

Clicking the GPX icon generates the GPX file and emails to the address that you registered with. - Transfer the GPX file from the email to your computer.
- Import the GPX file in as a track to the GPSnavX.

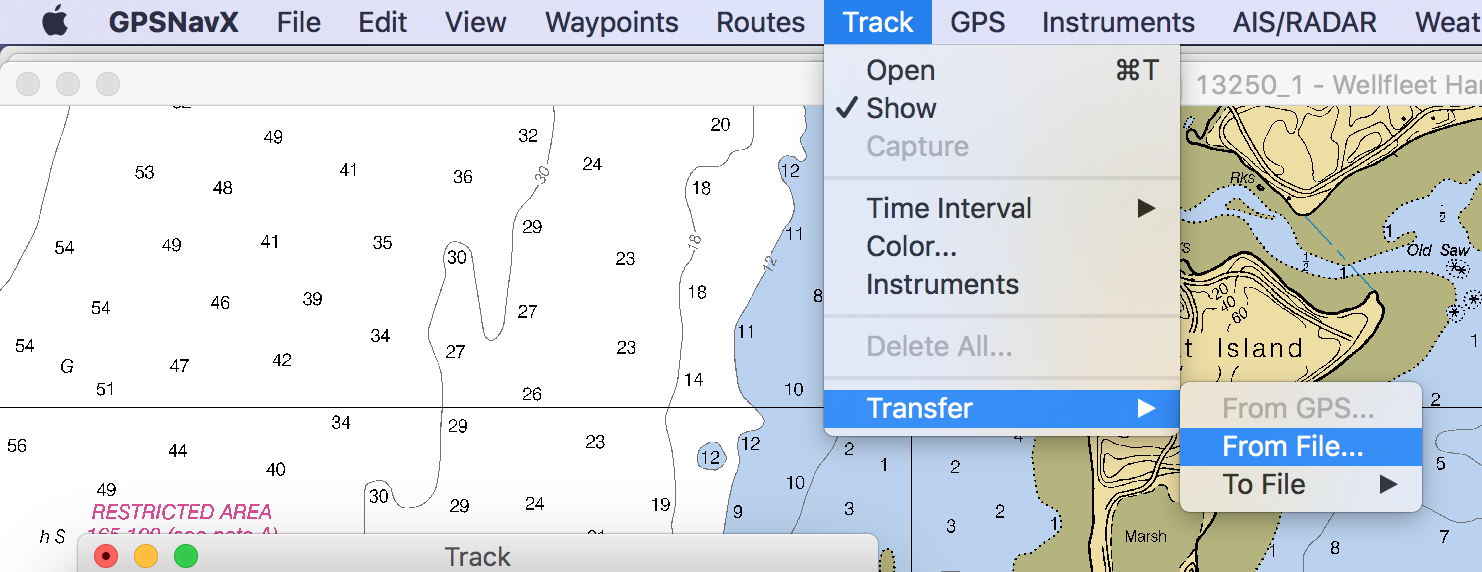
Once you do that, you get actual track you followed and the route you planned.

It really surprised me to see how much deviation I have between the planned course and the actual. Some of this is by accident and some of it is on purpose. A couple of illustrative examples.
- When I rowed from WP0003 to WP0004, I navigated by going from buoy to buoy instead of just following a compass course. Then I followed the compass for the last 2km of it. There was a current on starboard bow, which set me to the east over that span. When I hit the planned distance (about 3km), I started looking around for the buoy that marked WP0004. I saw it off to my starboard side, and turned toward it.
- The next section (WP0004 to WP0005), I think I didn’t steer very well. I was supposed to be on a 230 degree heading, but it looks like I actually was a lot closer to 220. This was close to right into the wind, so it might have been that I was getting a slightly easier ride on this heading, but I’m sure I could have steered it better. I rowed the 3km and then looked around for the buoy I was aiming at and I could see it. I rowed a bit more and finally spotted it. I decided to turn early instead of going all the way to the buoy.
- I seem to have the same angle offset in the section from WP0005 to WP0006. I knew that my course should bring me close to buoy #3 and leave it on my port side. After I had rowed about 2.5km, I looked all around for the buoy and saw it off in the distance on my starboard side! Whoops. So, I corrected course to make sure I actually got WP0006. Again, I rowed about the right distance and then did a scan for the buoy, which I saw off to starboard. I turned toward it and did a wide turn around it. After all, it marks a shipwreck, I didn’t want to get tangled up in that!
- On the way back, I rowed to buoy #3, and then I decided to cut the corner to save a little time and distance. Instead of continuing back to WP0005, I made a guess about a heading to get me to WP0004. It was a long row, about 8km, but I finally got the buoy in sight and then turned east for the finish.
So, why do all this work after I finish a row. Well, I do it because I want to learn as much from a training session as I can. From the analysis of this row, here what I took away.
- I need to practice steering to specific compass courses. For this, I will probable plan out some shorter compass legs and see how close I can come.
- I need to thin through how tidal currents will effect navigation and factor in corrections.
- I’m doing a good job managing effort on long rows to avoid burning out
As always, please feel free to leave comments and questions.